
Vacuum sealing food in mason jars removes most of the air from the jar, which helps dry goods like nuts, dried fruit, herbs and grains stay fresh longer. This guide covers the tools you need, the step-by-step process, and tips for getting a good seal.
How to vacuum seal food in mason jars
How to vacuum seal food in mason jars step by step
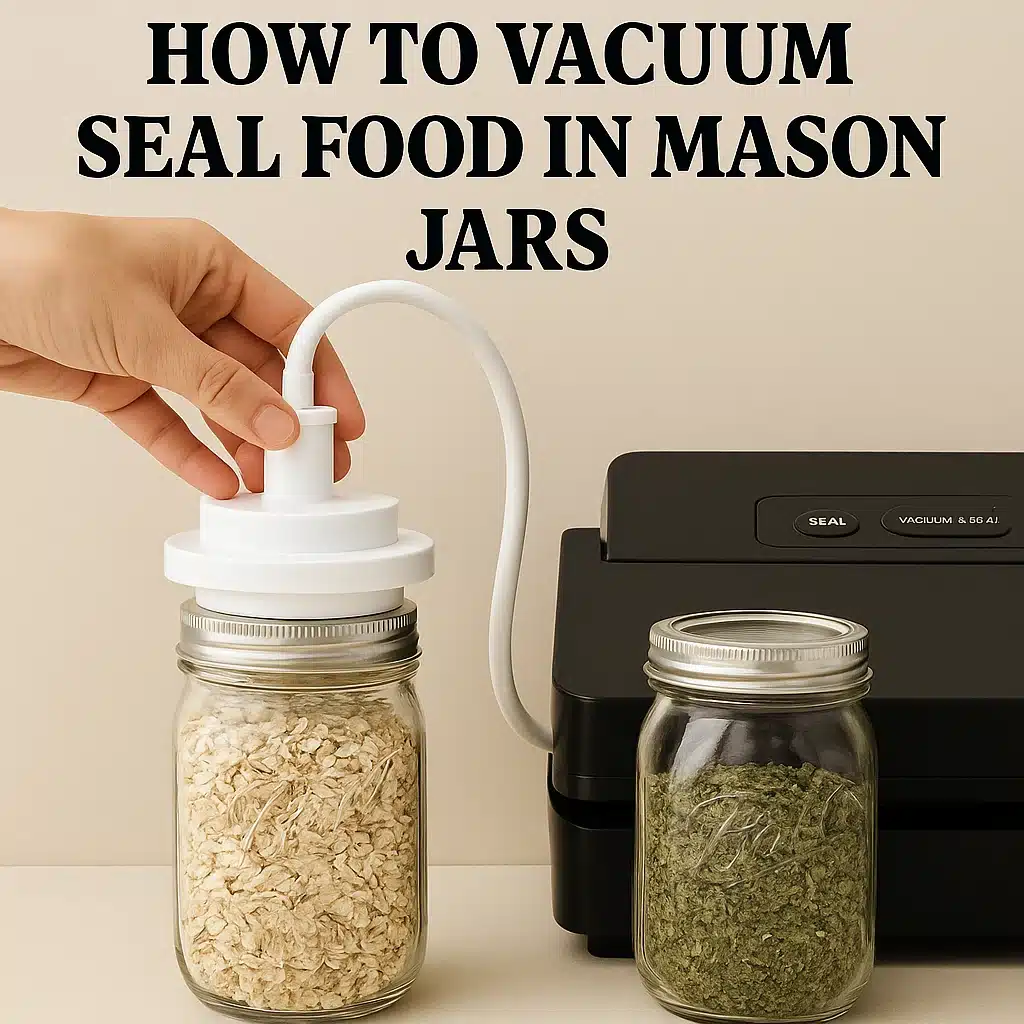
Learning how to vacuum seal food in mason jars is one of those small kitchen skills that feels almost magical once you try it like discovering a secret doorway to longer-lasting pantry ingredients. The idea is simple: remove the air, protect what’s inside, and let your jars guard the flavors you love. I still remember the first time I sealed a jar of toasted pecans; the warm nutty smell drifted up as I twisted the lid, and I felt oddly proud, as if I’d saved a little piece of autumn for later.
At its heart, vacuum sealing is just about creating a tight, oxygen-free space. When you understand how to vacuum seal food in mason jars, you start to see how beautifully it works for dry goods things like beans, grains, dried herbs, coffee, or homemade spice blends. It isn’t complicated: a clean jar, a proper lid, and a vacuum sealer attachment are usually all you need. And if you enjoy learning small skills one gentle step at a time, this little Mason jar guide fits right into that rhythm simple, reassuring, and made for everyday kitchens. Press a button, wait for that soft whump as the air is pulled out, and suddenly your ingredients are safer from moisture, air, and slow-creeping staleness.
Under all the warmth and storytelling, here’s the truth: this method is both old-fashioned and wonderfully modern a mix of tradition and technology that simply makes sense in any kitchen.
When Vacuum Sealing Makes the Most Sense
It’s especially useful when you want food to stay fresher, longer without freezing, canning, or adding anything extra. Think overnight oats mixes, dehydrated snacks, nuts, seeds, baking supplies, and those tiny pantry luxuries we forget we bought until it’s too late.
Why a mason jar vacuum sealer Makes Storage Last Longer
The first time I used a mason jar vacuum sealer, I remember feeling almost suspicious could a tiny tool really stretch the life of my pantry staples? But then I opened a jar of cinnamon six months later, and the scent hit me like walking into a warm bakery on a winter morning. That’s when I understood what this little gadget actually does.
Air is the quiet thief of flavor. It sneaks into dried herbs, nuts, spices, grains, and slowly pulls away the brightness. A mason jar vacuum sealer simply removes that thief from the room. By pulling out oxygen, it slows down oxidation the chemical process that dulls aroma, softens textures, and shortens shelf life. The food isn’t preserved by heat or chemicals; it’s preserved by absence.
There’s also something so lovely about the ritual: lining up clean jars, filling them with what feels like tiny promises coffee beans for slow Sundays, walnuts for banana bread, chamomile for late-night tea. Once sealed, everything stays fresher, crisper, and truer to its original self. And unlike plastic bags, the jars don’t trap smells, leak, or crinkle in that guilty “single-use” way.
The Science in Simple Terms
When oxygen is removed, moisture can’t creep in, oils don’t go rancid as quickly, and delicate flavors stay bright. It’s a gentle kind of preservation protective without being fussy.
How to Use a mason jar vacuum sealer Step by Step
Here’s the next section, simple, direct, and crawler-friendly:
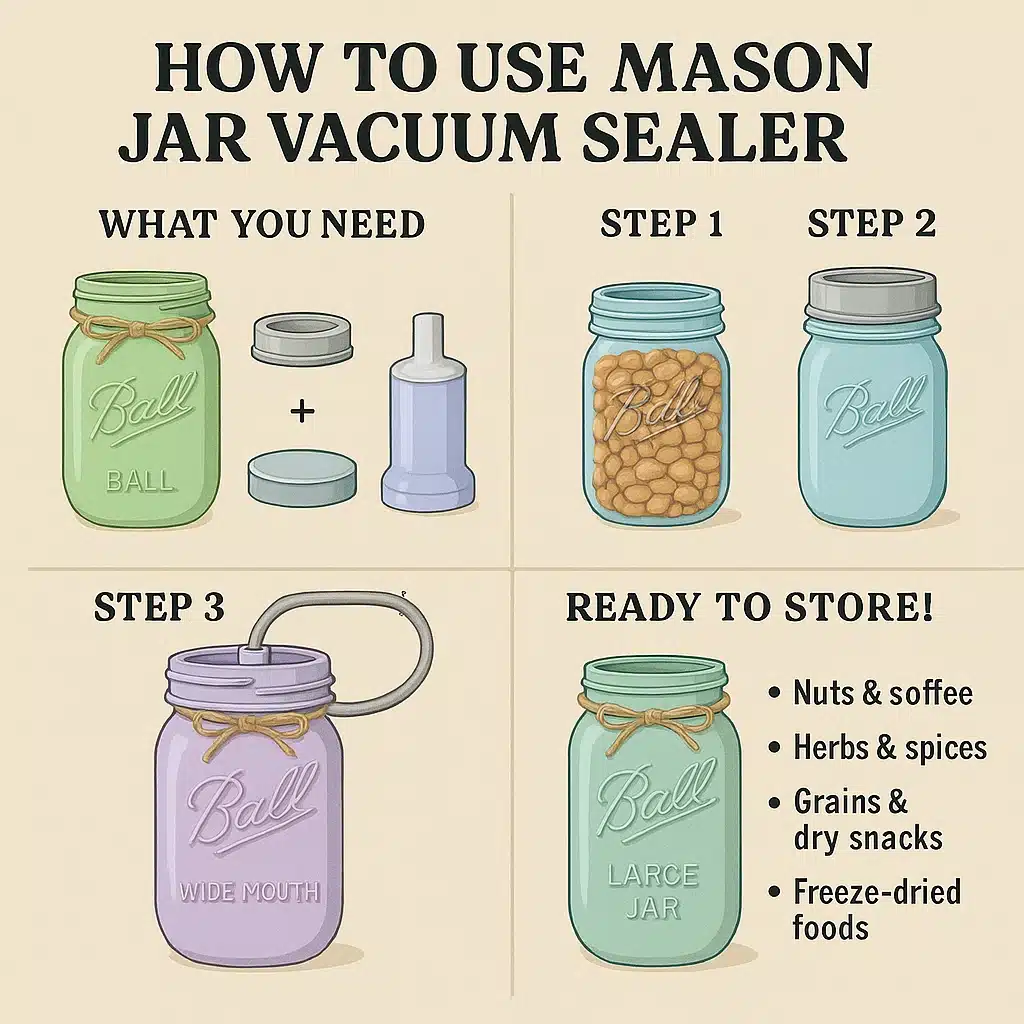
Using a mason jar vacuum sealer is much easier than it looks. Think of it as a small routine: fill, close, attach, press. If you’ve ever wondered how to vacuum seal food in mason jars without overthinking it, this is the calm, practical version.
Start with clean, completely dry mason jars and matching lids. This method works best for dry foods: nuts, coffee, grains, pasta, dried fruit, herbs, and homemade mixes. Avoid anything wet or “squishy” here — those belong in the fridge or freezer, even if they’re vacuum sealed.
Step 1 – Fill and Prep the Jar
Fill your jar, leaving about 2–3 cm of space at the top. Gently tap the jar on the counter to settle everything so there are no big air pockets. Wipe the rim with a clean, dry cloth; any crumbs or dust can stop the lid from sealing properly.
Step 2 – Attach the mason jar vacuum sealer
Place a flat lid on the jar (no ring yet). Set the mason jar vacuum sealer attachment over the lid, making sure it sits evenly. Connect the hose from your vacuum sealer machine to the attachment.
Step 3 – Seal and Check
Turn on the machine and let it run until it stops on its own. You’ll usually hear a small change in sound as the vacuum finishes. Gently remove the attachment. The lid should now be firmly sucked down. Only after that, screw on the metal ring for extra protection.
What You Can (and Can’t) Seal with a mason jar vacuum sealer
Using a mason jar vacuum sealer feels a little like organizing your pantry and your peace of mind at the same time. But not every ingredient belongs under a vacuum-sealed lid. Some foods thrive in that air-free space; others need a different kind of care. Once you learn the difference, your jars last longer, your shelves look calmer, and your ingredients stay as bright as the day you brought them home.
Foods That Seal Beautifully
Dry foods are the stars here. Think nuts, seeds, coffee beans, loose tea, whole spices, dried herbs, granola mixes, dried fruit, flour, oats, powdered sugar, pasta, and dehydrated vegetables. These ingredients love the low-oxygen environment because it slows down staleness, preserves aroma, and keeps oils from turning rancid. If you enjoy prepping baking mixes, smoothie blends, or homemade spice blends, they’re perfect candidates for vacuum sealing too.
Foods You Shouldn’t Seal in Mason Jars
Anything moist or perishable like cooked food, fresh fruit, garlic in oil, dairy, or anything that needs refrigeration is unsafe to vacuum seal in jars at room temperature. The vacuum removes air, not bacteria, so these foods require either proper canning or cold storage. Even with a vacuum seal, they must stay in the fridge or freezer.
The Simple Rule to Remember
If it’s dry, shelf-stable, and doesn’t contain moisture, it’s almost always safe. If it’s wet, fresh, or low-acid, vacuum sealing alone isn’t enough.
Learning how to vacuum seal food in mason jars isn’t just a kitchen trick it’s a small system that saves money, reduces waste, and keeps your pantry ingredients tasting the way they should. When the air is removed, flavors stay brighter, oils stay stable, and herbs keep their color longer. It’s the kind of home skill that feels simple but gives you real daily benefits: fresher coffee, longer-lasting nuts, crisp dried fruit, and spice blends that smell like you just mixed them.
Clear Answers About How to Vacuum Seal Food in Mason Jars
Does vacuum sealing in mason jars really extend shelf life?
Yes — for dry foods, it slows oxidation and moisture exposure, often doubling or tripling freshness time.
Can you seal anything?
No — wet, low-acid, or perishable foods still require refrigeration or proper canning.
Do you need a special machine?
A countertop vacuum sealer with a jar attachment works best, but handheld models work for many jars.
Is it safe for long-term storage?
Yes for dry goods. You can store within the pantry for months or even a year depending on the food.
Are mason jars better than plastic bags?
For pantry items, absolutely. They block odors, protect flavors, and are reusable.
Extra Tips Most People Don’t Know
- Toasting nuts before sealing intensifies flavor and preserves aroma longer.
- Vacuum-sealed dried herbs keep more color when stored away from sunlight.
- You can safely vacuum seal powdered mixes (pancake, cocoa, chai, oatmeal jars) for quick meal prep.
- For beans and grains, sealing in small batch jars prevents “pantry fatigue” and accidental staleness.
- If lids ever lose their seal, you’ll hear the faintest click when pressing the center simply reseal.
In the end, this method is a blend of old-fashioned mason jar charm and modern preservation. It keeps your shelves organized, your food vibrant, and your kitchen routine just a little more peaceful.